Abstract: This article introduces how to use pdf.js and the pdf.js-based annotation development kit Elasticpdf in Angular. The integration can be completed in 5 simple steps, including cloud server. The sample code is simple and shared at the end of the article. You can complete the project integration by copying and pasting.

1. Code package and Demo
1.1 Library Introduction
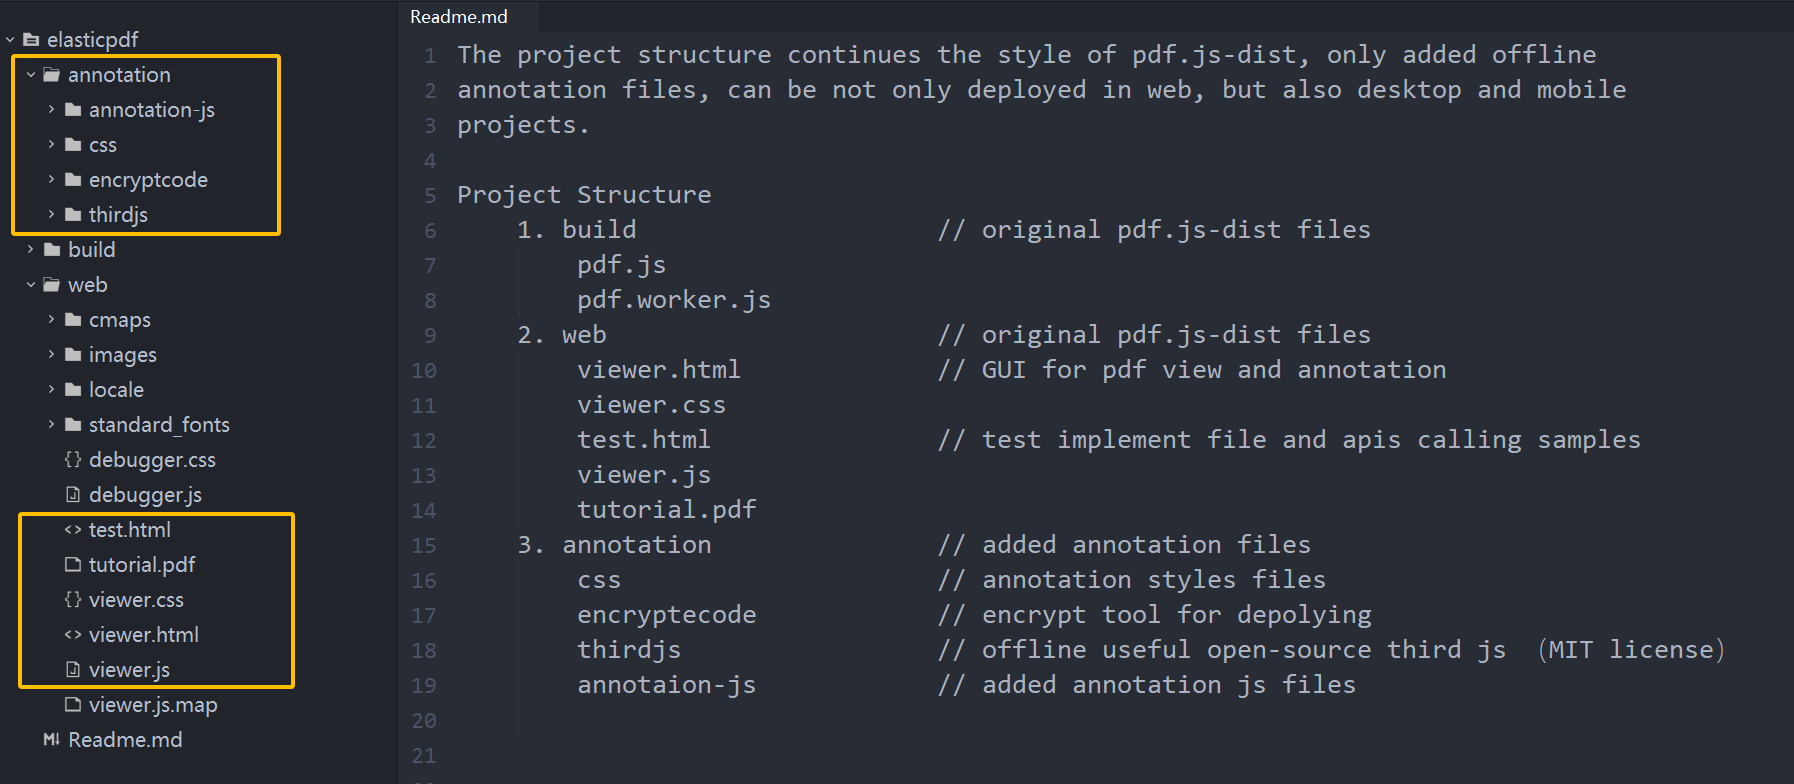
ElasticPDF is based on the open source pdf.js (Demo:https://mozilla.github.io/pdf.js/web/viewer.html) and adds a variety of out-of-the-box PDF annotation features. The code package continues the independent and completely offline structure style of pdf.js-dist, and only adds offline Javascript code to support annotations. It can be quickly and perfectly integrated into any project environment that can run Javascript, HTML, and CSS, and run perfectly in both public and intranet environments.

1.2 Online Demo
For the different features and budget requirements, there are two versions of the products, they are only differ in the final annotation saving stage, demos are as follows:
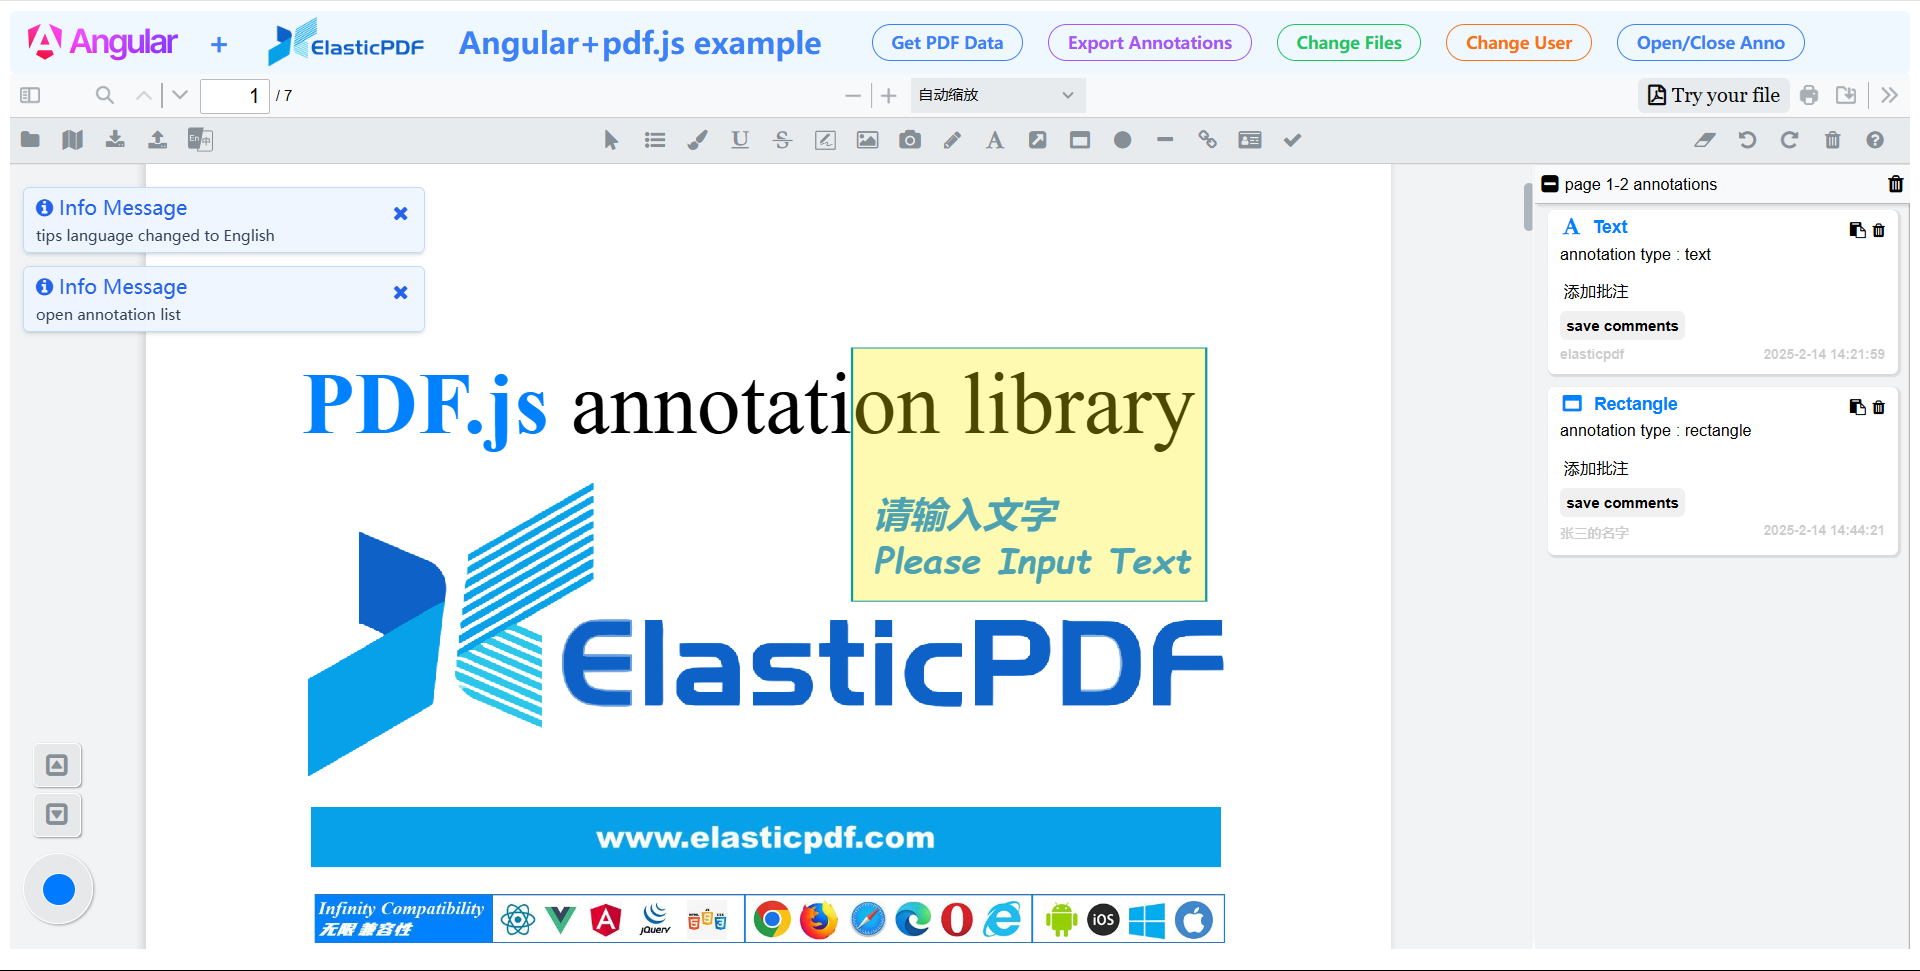
① Annotation synthesis version: https://demos.libertynlp.com/#/pdfjs-annotation
② Professional annotation version: https://www.elasticpdf.com/demo
2. Move to Angular project
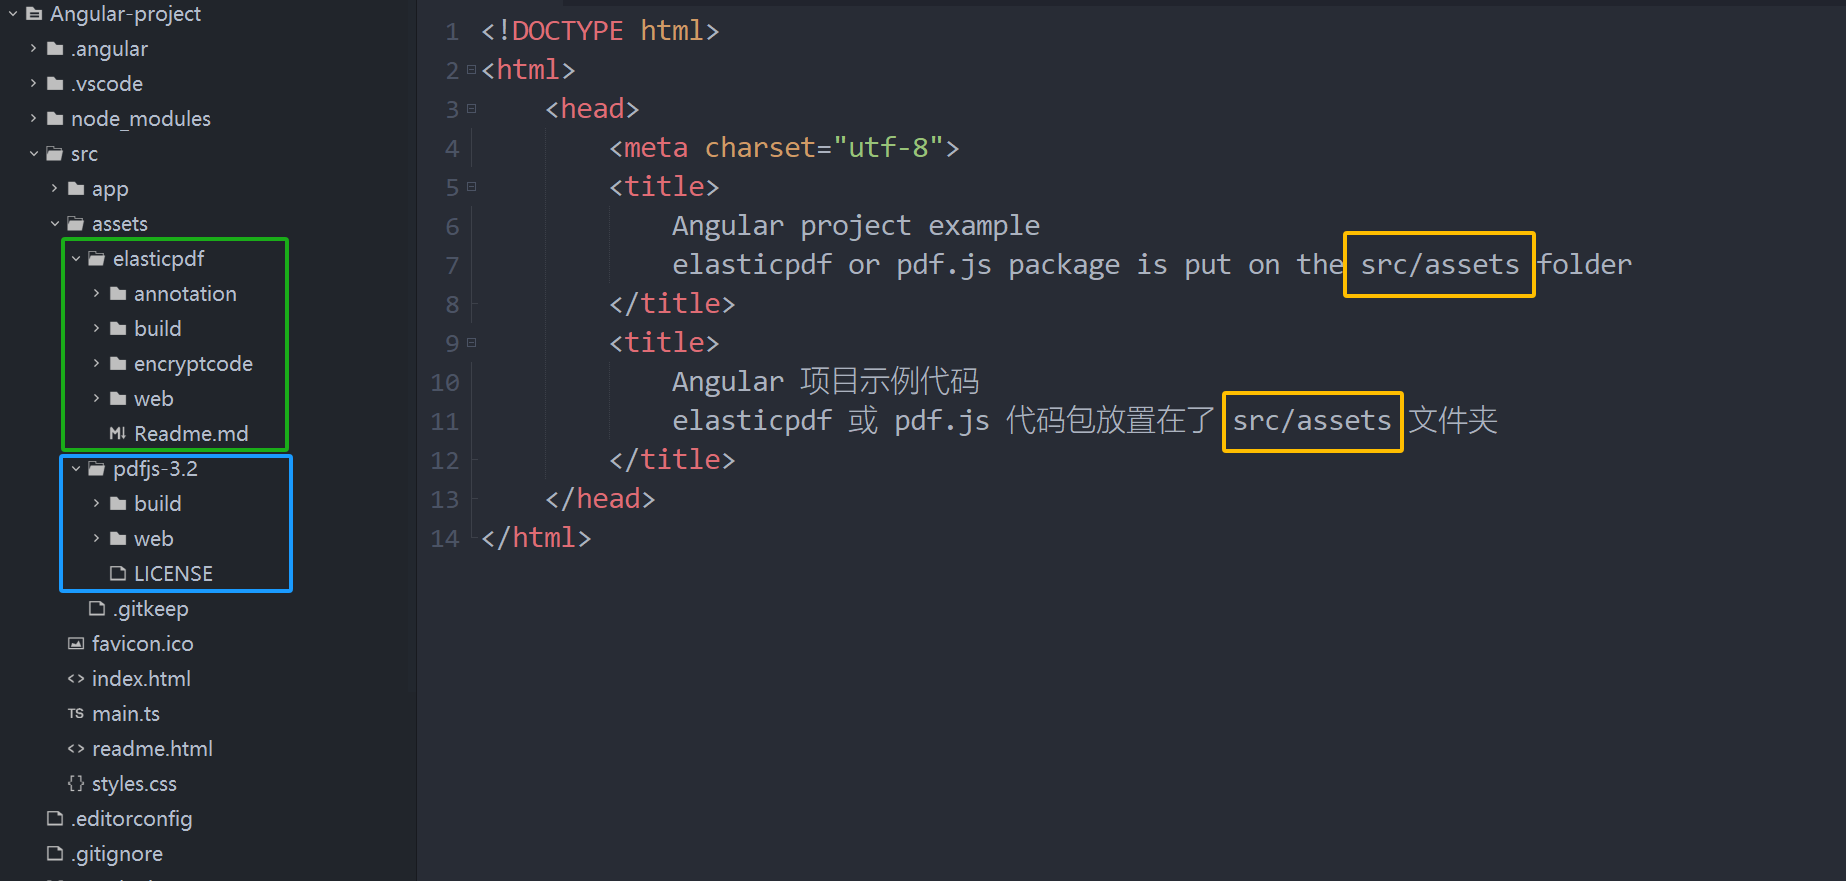
Move pdf.js or Elasticpdf package to the src/assets folder of your Angular project.

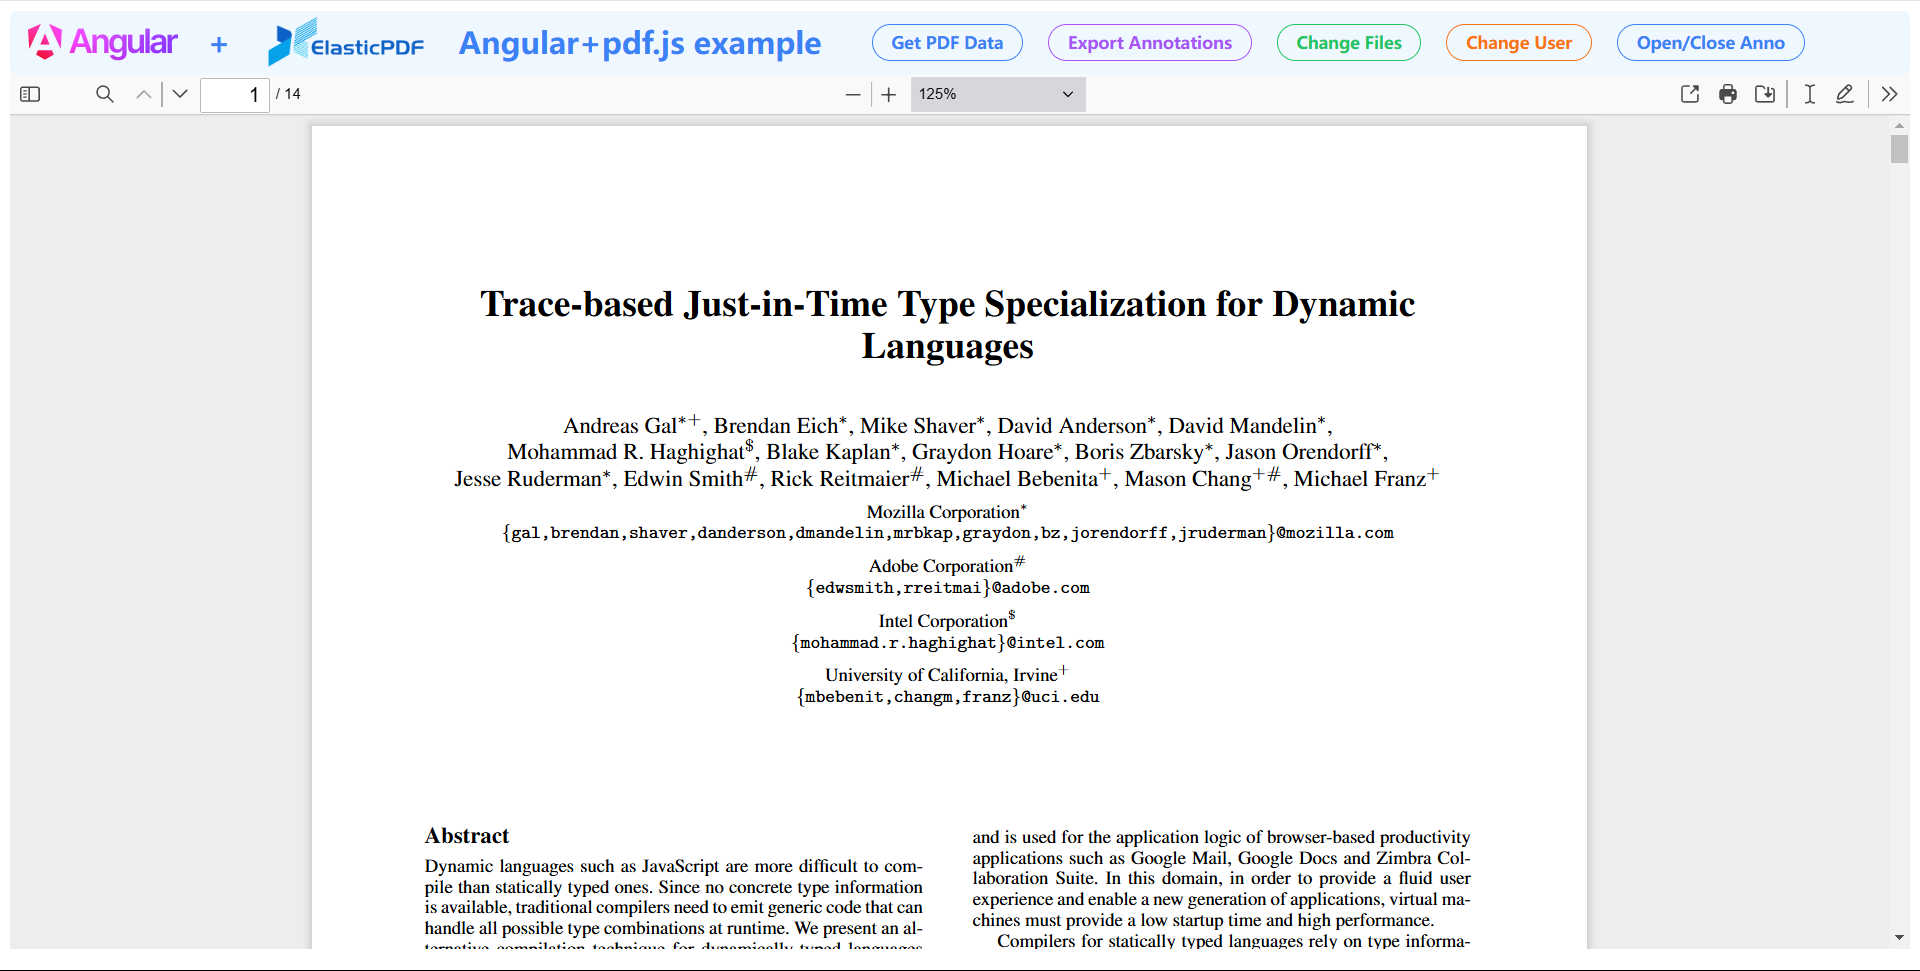
Snapshot of pdf.js running in Angular project.

3. Import the viewer.html file
① Use <iframe> to import the viewer.html file in the pdf.js or elasticpdf package into Angular page, for example app.component.html. Be careful not to write the wrong path.
<!-- elasticpdf example -->
<iframe src="assets/elasticpdf/web/viewer.html" id='elasticpdf-iframe'
(load)='initialPDFEditor()' width="100%" height="700px" frameborder="0"></iframe>
<!-- pdf.js example -->
<iframe src="assets/pdfjs-3.2/web/viewer.html" id='elasticpdf-iframe'
(load)='initialPDFEditor()' width="100%" height="700px" frameborder="0"></iframe>
If error appears after importing viewer.html and the message is Uncaught SyntaxError: Cannot use import statement outside a module, then you need to change import module of viewer.js and pdf.js in viewer.html by adding type='module'. Otherwise, because Vite automatically injects code into js and create the above error.
// import pdf.js and viewer.js
<script src="../build/pdf.js"></script>
<script src="viewer.js"></script>
// changed importing pdf.js and view.js
<script type='module' src="../build/pdf.js"></script>
<script type='module' src="viewer.js"></script>
② Set the default value of defaultUrl in viewer.js as empty, otherwise the compressed.tracemonkey-pldi-09.pdf file will be loaded by default when viewer.html is imported in step ①, affecting the process of custom loading files. The viewer.js in the Elasticpdf code package has been modified already.
// original defaultUrl
defaultOptions.defaultUrl = {
value: "compressed.tracemonkey-pldi-09.pdf",
kind: OptionKind.VIEWER
};
// set as empty
defaultOptions.defaultUrl = {
value: "",
kind: OptionKind.VIEWER
};
③ Call the initialApp() function under the <iframe> onLoad() function in the Angular page (for example app.component.ts). Since the functions in pdf.js and elasticpdf are in the scope of iframe, they must be called after the iframe loaded when contentWindow of the iframe can be obtained.
var elasticpdf_viewer:any = null;
var elasticpdf_iframe:any = null;
export class AppComponent {
initialPDFEditor() {
elasticpdf_iframe = document.getElementById('elasticpdf-iframe') as HTMLIFrameElement;
let pdf_url = "compressed.tracemonkey-pldi-09.pdf" as string;
if (elasticpdf_iframe && elasticpdf_iframe.contentWindow) {
elasticpdf_viewer = elasticpdf_iframe?.contentWindow as any;
if (elasticpdf_viewer?.initialApp) {
elasticpdf_viewer?.initialApp({
'language': 'en', // UI language
'pdf_url': pdf_url,
'member_info': { //member information
'id': 'elasticpdf_id',
'name': 'elasticpdf',
},
});
}
}
}
// listen message of pdf loading, editing and saving
@HostListener('window:message', ['$event'])
onMessage(event : Event) : void {
const e : any = event;
if (e.data.source != 'elasticpdf') {
return;
}
// callback of pdf loading, you can import annotation files stored on server
if (e.data.function_name == 'pdfLoaded') {
console.log('Angular PDF loaded 加载成功');
this.reloadData();
}
}
}
④ The pdf.js initialization function is as follows. Its main content is to call PDFViewerApplication.open() to open the pdf url, and use the loadPdf() function to monitor whether the document loaded is completed. Finally, the loading status is broadcast to the Angular page through postMessage.
<script type='text/javascript'>
//initial function
function initialApp(paras) {
var oriUrl=paras['pdf_url'];
PDFViewerApplication.open(oriUrl);
interval = setInterval('loadPdf()', 1000);
}
//listen pdf loaded
var interval = null;
function loadPdf() {
if (PDFViewerApplication.pdfDocument == null) {
console.info('Loading...');
} else {
//initial completed
console.log('PDF Load successfully');
clearInterval(interval);
//broadcast message
postPDFData("pdfLoaded", '');
}
}
//boradcast pdf.js operation status message
function postPDFData(function_name,new_content){
window.parent.postMessage({"type":0,"source":"elasticpdf",'function_name':function_name,"content":new_content},'*');
window.postMessage({"type":0,"source":"elasticpdf",'function_name':function_name,"content":new_content},'*');
}
</script>
⑤ It should be noted that both the pdf.js client and the server storing the pdf file must support CORS. Specifically, if the server provides documents through programs such as Java or Python, CORS headers must be added in the program; if it is an nginx server, the you can add the following code in the Nginx configuration.
location / {
add_header Access-Control-Allow-Origin *;
add_header Access-Control-Allow-Headers *;
add_header Access-Control-Expose-Headers Accept-Ranges,Content-Range;
add_header Accept-Ranges bytes;
}
For CORS issue on the pdf.js side, you need to search for HOSTED_VIEWER_ORIGINS in viewer.js of elasticpdf or pdf.js and add the domain.
const HOSTED_VIEWER_ORIGINS = ["null", "http://mozilla.github.io", "https://mozilla.github.io"];
4. Export PDF and annotation data
There are two ways to save annotation data, and we recommend method 2. pdf.js writes annotations into the document defaultly and cannot be saved separately.
Method 1: Merge file and annotations
Write annotations to PDF and then download the entire document. Generally, users can use the Ctrl+S shortcut key and UI button to complete this. This method does not require the support of backend services at all.
You can use the following code if you need to save the PDF file with writing annotations to the server.
var elasticpdf_viewer:any = null;
var elasticpdf_iframe:any = null;
export class AppComponent {
// Bind this function to DOM to trigger PDF saving
// <button class='theme-btn btn-outline-info' (click)="getPDFData()">Get PDF Data</button>
getPDFData() {
elasticpdf_viewer.getPDFData();
}
// listen message of pdf loading, editing and saving
@HostListener('window:message', ['$event'])
onMessage(event : Event) : void {
const e : any = event;
if (e.data.source != 'elasticpdf') {
return;
}
// Receive PDF data
if (e.data.function_name == 'downloadPDF') {
let file_name = e.data.content['file_name'];
let pdf_blob = e.data.content['pdf_blob'];
let pdf_base64 = e.data.content['pdf_base64'];
console.log('PDF信息', pdf_base64);
// Receive PDF data, pdf_base64 string data can be quickly uploaded to the server
this.postService('upload-pdf-data', {
'file_name': file_name,
'file_id': '123ddasfsdffads',
'file_data': pdf_base64,
});
}
}
}
Method 2: Save annotations separately
Save the annotation file separately. For cloud synchronization scenarios, you can export the annotation file as a JSON file, transfer and save it on the server, and then reload and display it to continue editing the annotation.
This method only requires an online PDF original file and only transfers a small volume of annotations (usually less than 1M in size), which can save a lot of storage and broadband costs.
// In the callback function after PDF annotation editing, all annotation files can be read and uploaded to the server
@HostListener('window:message', ['$event'])
onMessage(event : Event) : void {
const e : any = event;
if (e.data.source != 'elasticpdf') {
return;
}
// PDF annotation editing callback, annotations can be exported here and transmitted to the server
if (e.data.function_name == 'annotationsModified') {
// Only get PDF annotation files, do not write to PDF
let this_data = elasticpdf_viewer.pdfAnnotation.outputAnnotations();
let annotation_content = JSON.stringify(this_data['file_annotation']);
let file_name = this_data['file_name'];
console.log('批注信息', annotation_content);
this.postService('upload-annotation-data', {
'file_name': file_name,
'file_id': '123ddasfsdffads',
'file_annotation': annotation_content,
});
}
}
5. Reload PDF and annotation data
When you save PDF annotations at the server separately, you can download it from the server again after loading the PDF file and reload them to continue editing.
// In the callback function after PDF loading is completed
// you can request the corresponding annotation from the server and reload it on PDF.
HostListener('window:message', ['$event'])
onMessage(event : Event) : void {
const e : any = event;
if (e.data.source != 'elasticpdf') {
return;
}
// PDF loading is completed, you can reload the annotation file stored on the server
if (e.data.function_name == 'pdfLoaded') {
console.log('Angular PDF loaded');
this.reloadData();
}
reloadData() {
let file_name = 'tutorial.pdf'
let annotation_content =this.postService('get-annotation-data', {
'file_name': 'tutorial.pdf',
'file_id': '123ddasfsdffads',
});
// Annotation reloads and displays on current file
elasticpdf_viewer.setPureFileAnnotation({
'file_annotation': annotation_content
});
}
}
All the above communications with the server require network functions. The backend server needs a program to receive and save data. We have simple PHP, Python and Java code examples for elasticpdf customer reference.
The code of the sample function postService() that initiates the request on the front end is as follows.
// function connecting backend program
postService(url:any, data:any) {
var new_data = new URLSearchParams();
var encrpte_data = data;
new_data.append('data', encrpte_data);
var base_url = "your-server-url";
var posturl = base_url + url;
const response = await fetch(posturl, {
method: 'POST',
headers: {},
body: new_data,
});
const resp = await response.json();
resp['data'] = JSON.parse(resp['data']);
return resp;
}
Summary
So far, the code of integrating pdf.js and elasticpdf into the Angular projects has been introduced. The complete sample project is uploaded on Github(Repositories Link: https://github.com/ElasticPDF/Angular-use-pdf.js-elasticpdf). For elasticpdf customers, welcome to contact us and we will provide you with sample code if you have other application requirements.
Tips: This article was first published on https://www.elasticpdf.com ,Please indicate the source when republishing: https://www.elasticpdf.com/blog/angular-use-pdfjs-and-elasticpdf-tutorial.html